

Makeup is always captivating, but particularly when you’re young. We remember watching in awe as our older family members applied makeup. We were so enthralled by the process and dreamed of the day when we, too, could wear makeup and create gorgeous looks just like them.
By the time most of us were old enough or skilled enough to use makeup, we were either too busy to learn how to correctly apply it or ended up learning from friends, family members, and YouTube videos (or all three!). All of this can be information overload, and there is sometimes lots of conflicting information telling you how to do one certain thing. Learning to properly apply makeup is truly an art form and allows people to express their personal style. If you want to be able to develop your look and hone in on your particular sense of style, you’re going to need to know some makeup basics.
Applying makeup can be daunting, but learning how to apply eye makeup is a whole other level. How many of us have had a “raccoon eye” experience trying to perfect a sultry smokey eye? No matter how many Instagram tutorials you watch, chances are your eye makeup skills are not where you want them to be. With so many eye makeup products available on the market, it can be a huge decision just trying to determine which eye products are worth your time. In this tutorial, we will try to help you make sense of eye makeup and help you determine which products you need for a beautiful look, and which aren’t always necessary.
Whether you are a makeup queen with every product possible, a no-nonsense lip balm and mascara girl, or a fresh-faced newbie, this guide will help you determine how to properly apply eye makeup so that you can create dramatic looks of your own.
EYE MAKEUP: THE BASICS
There are thousands of eye makeup products available on the market— primers, shadows, bases, highlighters, eyeliner, mascara, lash lengtheners, and of course, eyelash enhancements. You could quite literally spend hours every day creating a different eye makeup look and style. If you are like most of us, you don’t have time to apply that much makeup unless it’s for a special occasion. As such, you need to know the basics.
You want the products that will give you the most bang for your buck and net you the most style and beauty for the short amount of time you have. Here is our list of must-have eye makeup products that you should be using right now.
- Primers. It’s tempting to skip the eyeshadow primer because it can seem like an unnecessary step. However, we all know how frustrating it is when our eyeshadow creases within half an hour of being applied. Primers help to reduce the amount of natural oil that your skin produces which can interfere with your eye makeup, and create a smooth base that is better for eyeshadow application. No matter what kind of shadow formula you are using, whether it is cream or powder, a primer can help your shadow stay on longer and look just as it did the moment you put it on.
- Shadows. This goes without saying, but eyeshadow is a must for any kind of eye makeup look. If you are very low-key and prefer a look that is more natural and simple, you can probably get away with one to two neutral shades. However, if you are more adventurous, or are celebrating a special occasion, three to four colors will create a dramatic eye look from the base of your lid all the way to your eyebrow. Eyeshadow has the ability to transform your eyes, draw attention to your irises, and create a completely original look.
- Liners. Eyeliners help define and give shape to your eyes. Not only do liners add shape, but the use of liners and the way they are applied can also actually make your eye look bigger. If you apply them incorrectly, they can make your eye look smaller. Additionally, eyeliners can create dramatic looks when they are applied in different colors.
- Mascara. Possibly the most popular eye makeup product on the market today is a great tube of mascara. Our fascination with and desire for long, full, voluminous eyelashes dates back for centuries. Mascara was one of the first cosmetic products that promised people with lashes more sparse than they would like, the opportunity to have the lashes of their dreams. Mascaras are available in a plethora of different formulas and shades and can be purchased in both waterproof and non-waterproof formulas. A great coat of mascara can make you look more awake than a strong cup of coffee.
While we include eyeliner and mascara on our list, there is a way to eliminate the need for both of these products with the use of just one. If you invest in a great pair of false eyelash strips, the need for eyeliner and/or mascara is gone. Minimalists, rejoice! Not only will this save you time and money, it will also create a more dramatic and noticeable look than both eyeliner and mascara together.
APPLICATION: HOW TO CREATE A SIMPLE, BEAUTIFUL EYE LOOK
You can create a beautiful look in less than five minutes without any prior make up experience. If that sounds too good to be true, read on. We have a step-by-step guide to teach you how to apply your eye makeup from start to finish, and when you’re done, you’ll be able to apply your eye makeup like a professional.
- Prime it. The best type of primer is one that dries quickly and has a great anti-creasing formula. Using your finger is the best method of applying a primer. Swipe one coat of primer on your entire lid from the corner of your eye to the other corner, and from the base of your lid to the top of your eyebrow. Be sure to blend it out! Setting your primer is a great way to ensure you won’t crease in the middle of the day, especially if you have oilier lids.
Doe tip: If you don’t own a primer, you can use your concealer or foundation and a little bit of translucent powder to get the same effect.
-
Shadow. To create a beautiful eye look, you will need three to four colors of eyeshadow.
- Highlighter. A highlighter should be a few shades lighter than your skin tone, and it should compliment your undertone. Use this shade on the extreme inner corner of your eye, just under the inner corner of your lash line, as well as on your brow bone.
Doe tip: If you don’t have an eye highlighter, you can use a facial highlighter to do the job.
- Midtone. A midtone shadow should be matte and slightly darker than your skin tone. It should be placed on your lid in and above your crease. Blend it from your inner eye to just outside the corner of your eye. If you have less eye space, or no crease, put this shade in the outer 2/3 of your eye up to where your crease would be.
- Contour shade. This shade should be two to three shades darker than your natural skin tone. Blend this shade in the outer corner of your eye to the middle of your lid. If your eyes are smaller, this should go in the outer corner of your eye and blend into the midtone shade.
- Eyeliner. Eyeliner should be applied directly above the natural lash line. You can choose how far from the outer edge of your eye you would like to bring your eyeliner in, but try to avoid fully rimming your eyes in liner, as that can make your eyes appear smaller than they actually are.
- Mascara. No matter what mascara formula you pick, you can always apply it the same way. Curl your lashes, then start applying your mascara as close to the root of your lashes as you can. After the initial coat dries, apply a second coat if needed.
Doe tip: If you constantly get mascara on your lids or under your eyes, you can use a mascara shield or a piece of cardstock to prevent that from happening.
HOW TO GET THE MOST STRIKING EYE LOOKS POSSIBLE
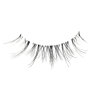
If you want eyes that are more noticeable with less makeup, you’ve got to use false eyelash strips. Nothing creates more beautiful lashes than a great set of falsies, like Doe Lashes’ Cloud 9. And the best part is, you won’t even need eyeliner or mascara. Your false lashes will look perfect on their own.
If you still prefer to wear eyeliner and mascara, you definitely can, but if you’re trying to save time and effort, you can skip those steps.
To get the best eye makeup look possible, apply your primer and eyeshadow as you normally would, but stop before you get to the eyeliner and mascara steps. Then, apply your Doe Lashes. Doe Lashes are super easy to apply and virtually fool-proof. All you need is a little eyelash glue and maybe an applicator tool, and you can apply eyelashes like a professional. Here’s a great tutorial if you’ve never applied false eyelashes before.
How To: Beginners Smokey Eye
The smokey-eye is a classic look that many are too scared to rock, but only because they’re shy of the application process. With this easy three-step smokey eye routine, even the newest of newbies should be able to achieve this bomb look.
- Step 1: Create your base using a neutral shadow or liquid concealer. This step will even everything out and cover up any unwanted darkness on the lid. It also helps to grab any products you’re applying, keeping everything in place.
- Step 2: Apply a darker color (dark brown or black) to your crease and use a round brush to get into that small space in your eye-socket. Move the brush about 2/3 of a way towards the nose and in the inside corner above the eyelashes, along your outer “V.”
- Step 3 - Blend everything out, and then go in with your concealer to help clean up and harsh lines or edges.
And that’s all it takes to get a killer smokey eye!
How To: Beginners Winged Eyeliner
Winged eyeliner is not always considered beginner-friendly. However, with this easy trick, you should be able to achieve the perfect winged liner—even if you’re new to the makeup world.
1. Grab some washi tape and apply it to the outer corners of the
eyelid in a diagonal line, running from the corner of your outer eye to wherever you want your wing to end.
2. Use a thin brush or eyeliner pencil and apply black or brown liner along the outside of the tape and your eyelashes. If you want a really sleek, sharp line, use a liquid liner rather than pencil.
3. Remove the tape, and you’re all set.
How To: Beginners Contouring
Contouring is every makeup newbies’ worst nightmare, but it’s essential to complete any full face beat. We think it’s one of those things that seems much more complicated than it really is.
First - let’s talk about what you’ll need.
Tools:
- Concealer or foundation (1-2 shades lighter, 1-2 shades darker than skin tone)
- Blending brush or sponge
- A highlighter or illuminator
Optional: Setting spray or translucent powder
It’s almost time to put those new goodies to work, but first, you’ll have to figure out your face shape.
- Oval - face tapers towards the chin, wider forehead, prominent cheekbones.
- Long - face tapers towards the chin, elongated features, prominent chin.
- Round - face width and length are almost the same, widest at cheeks.
- Square - forehead, cheekbones, and jawline are the almost same width, square, boney, and prominent jawline.
- Heart - face tapers towards the chin, pointy chin, prominent forehead.
- Diamond - Highly angular and somewhat bony, widest at temples, uncommon.
Go ahead and skim through the list and try to figure out which shape best fits yours. This is a loose-guide. Not everything will be the same, but try to find similarities. Try and find the closest one to your face-shape as each face-shape will require different kinds of attention.
Step 1. You’ll first start with your lightest concealer. You’ll apply this in the places you’d like to highlight: the bridge of your nose, chin, under your eyes, and middle of your forehead.
Step 2. With the darker concealer, apply that in areas where you want more depth or definition— your jawline, sides of your nose, hollows of the cheeks, temples, and the perimeter of your forehead.
Step 3. At this point, you might think you look a little silly, but no worries, this phase won’t last long. The final step is the blending process. This is easily the most essential step of the process and shouldn’t be rushed or cut short.
You can use either a wide blending brush or a makeup sponge; depending on your personal preference. Just be sure to blend out any harsh lines. The goal is for it to look natural and effortless.
Now take a step back and admire your hard work. You’ve officially just contoured like a pro for the first time.
How To: Lashes For Beginners
Eyelashes are a crucial step to any makeup routine. Whether you’re a strictly mascara kind of gal or like to add a bit of flair to your makeup looks with some false lashes, we’ve got you covered.
Mascara
Even if you’re entirely new to the world of eyeshadow, contour, and smokey eyes, you most likely have worn mascara in the past. But, just in case you feel like you need a refresher on the mascara application, some tips, or hacks—keep reading.
The first step to making sure your mascara is on point is to curl your lashes. This will make your natural lashes appear fuller and more voluminous, so you can get those sky-high lashes that you’re after.
A steady hand is key when applying your mascara. Be patient, and don’t blink! The last thing you want mascara all over your fresh contour and eyeshadow.
Apply 1-2 coats of your favorite mascara, and you’re good to go.
False Lashes
Applying false lashes might seem complicated at first, but all it takes is a little practice. And if you struggle the first few times, just be patient. It’s all about practice and using a high quality pair of lashes.
The nice thing about false lashes is that it really only takes a few steps. All you have to do is apply the lash glue to the line of the false lash, hold it for a second until it becomes tacky, then use a tweezer and your finger to lay the false lash onto your lash line gently. Press down and hold into place until the glue is completely dried (1-2 mins).
Tips On How To Get The Perfect Eyeshadow
Yes, we’ve covered what you need to buy to get the perfect eye look, but mastering the art of eyeshadow is not the easiest thing. Now that you know the basics and every other aspect of your makeup is looking on point, it’s time to step up your shadow game as well.
With eyeshadow application, it’s all in the technique. And we’re here to give you some easy go-to technique tips to help up your shadow game.
Tip 1. Use Just Your Finger
We know all the different types of brushes can be intimidating, especially if you don’t even know where to start. If you’re trying to get comfortable with the whole eyeshadow thing, don’t let all those options scare you away. Considering you might have never even used an eyeshadow brush, you may get cleaner and smoother lines using just your finger.
For the base, there is no harm in applying it with your index finger. Then if you’d like to use a small brush to do the more detailed steps, feel free.
Just don’t forget to blend everything well afterwards, especially if you applied most of it with your finger.
Tip 2. Don’t Skip Concealer
Didn’t know you were supposed to use a concealer on your eyeshadow looks? No worries—most beginners don’t. Using concealer post-shadow-application is an important step that can elevate your eye makeup to the next level.
Once your shadow look is finished, you can use the concealer to help clean up any rough spots or edges. But, where you’ll really want to focus the concealer is in areas like your brows. Once you’re done filling in your brows, take an angled brush with a small amount of concealer on it and use it to clean and sharpen the brow area.
Tip 3. Don’t Skip The Lower Lash Line
Most beginners aren’t aware that your lower lash line is just as important as your eyelids. Sure, you can just slap on some liner, but why shouldn’t you go a little crazy with the shadows to complete the look?
It’s a good idea to use a smaller brush, this way; you can be more precise.
Sometimes it can be confusing to know which shade should be put on the lower lash line, and honestly, it just depends on what kind of look you’re going for.
Traditionally, the color you used for your look’s base would be used for the lower lash line, but you can always switch it up if you’re feeling bold. Consider using a contrast color or even something with a bit of pop to it. It’s also common to use a shimmery shade to open up those eyes a bit.
Eye makeup can be intimidating, but once you understand what products are available and how they work, you can feel confident in knowing which ones you need and work best for you. With a little practice, you can create stunning eye makeup looks in very little time. The use of Doe Lashes will always make your eyes look more noticeable, wider, and more glamorous than simply mascara and shadow alone.
Sources:
https://www.self.com/story/eyeshadow-tips-for-beginners
https://www.instructables.com/Highlighting-and-Contouring-for-beginners/